In previous Part 1 blog we talked about how Interops allow users to add speedy and time critical code to any managed TinyCLR OS application. In this second part, we want to show you how to build our native code using Visual Studio! Yes you heard that right. You are not going to install any additional software.
By the way, the docs for this is found at http://docs.ghielectronics.com/software/tinyclr/native/interops.html
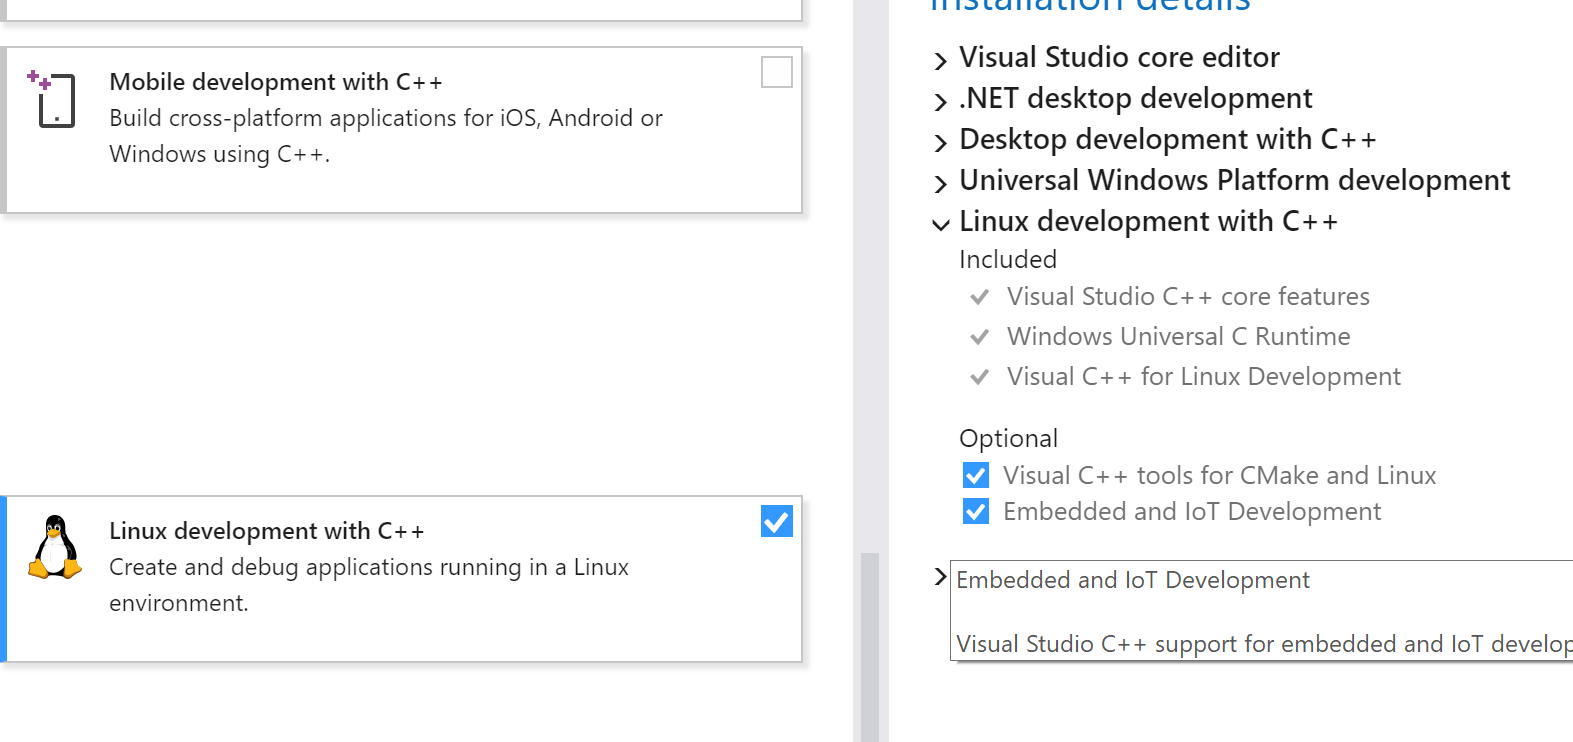
The first thing you need to do is make sure you have installed “Linux development with C++” and then check the “Embedded and IoT Development”
Once we have that done, we now need a folder with: (call the folder native)
- The source code of the Interop
- make file that tells compiler what to build
- Scatter file that tells the linker where in memory to place the compiled code
- TinyCLR.h file
Let us cover these individually!
1. The Source Code
When we need to add a native method (C++) that we call from managed (C#), the method will be decorated as follows:
[MethodImpl(MethodImplOptions.InternalCall)]
static public extern void EncipherFast(UInt32 Rounds, UInt32[] Data, UInt32[] Key);
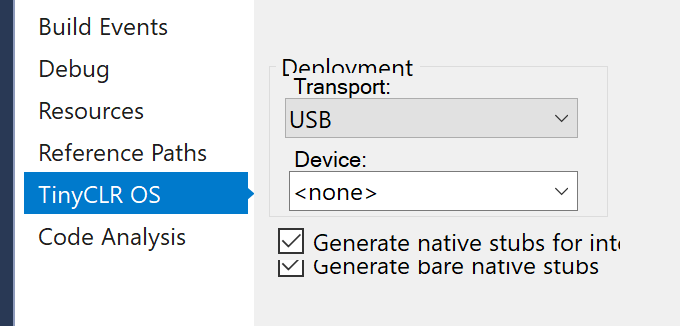
We will then need to let Visual Studio generate a couple of C++ files that you will need to get started. We do this by going to the project settings, to where TinyLCR options are, and then select the 2 check-boxes about generating stubs.
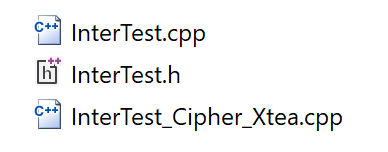
When we build our project now we would see three files. Two of them with the project name and a third one representing the class containing the native hooks.
The file with the project name has a list of available method, members and properties. All accessible from managed to native and vice versa. It also includes a checksum, in case there is a version mismatch.
The file representing the class contains a native method that is reflects the managed one. For example, compare these:
[MethodImpl(MethodImplOptions.InternalCall)]
static public extern void EncipherFast(UInt32 Rounds, UInt32[] Data, UInt32[] Key);
TinyCLR_Result Interop_InterTest_Cipher_Xtea::EncipherFast___STATIC___VOID__U4__SZARRAY_U4__SZARRAY_U4(const TinyCLR_Interop_MethodData md) {
Remember the checksum from before? It is used here to make sure the native reflects the managed correctly.
We can how compile these files as is, and call the native methods. We will get an unimplemented exception as this is what these files default to, but this is a good test to start with.
return TinyCLR_Result::NotImplemented;
We can go ahead and copy these files to our “native” folder. These files will be overwritten every time we build so making a copy is necessary.
2. make file
The make file tells the compiler what to build and how. This example will build all local C++ files and place the output files in “bin” folder
We can now create a file called makefile and put this in it.
OUTPUT_NAME = bin/Interop
LINKERSCRIPT_NAME = scatterfile

MCU_FLAGS = -mcpu=cortex-m4 -mthumb
INC_DIRS = -I./include

CC = arm-none-eabi-g++.exe
LD = arm-none-eabi-g++.exe
OC = arm-none-eabi-objcopy.exe

CC_FLAGS = $(INC_DIRS) $(MCU_FLAGS) -g -std=c++11 -xc++ -Wall -Wabi -w -mabi=aapcs -fPIC -fno-exceptions -fno-rtti -fno-use-cxa-atexit -fno-threadsafe-statics

# Use this for optimize for size when not debugging
CC_FLAGS += -O2

LD_FLAGS = $(MCU_FLAGS) -nostartfiles -lc -lgcc -T $(LINKERSCRIPT_NAME) -Wl,-Map,$(OUTPUT_NAME).map -Wl,--oformat -Wl,elf32-littlearm
OC_FLAGS = -S -O binary

SRC_FILES = $(wildcard *.cpp)
OBJ_FILES = $(patsubst %.cpp, %.obj, $(SRC_FILES))

build: $(OBJ_FILES)
	if not exist bin mkdir bin
	$(LD) $(LD_FLAGS) -o $(OUTPUT_NAME).elf $^
	$(OC) $(OC_FLAGS) $(OUTPUT_NAME).elf $(OUTPUT_NAME).bin

clean:
	rm $(OBJ_FILES) $(OUTPUT_NAME).bin $(OUTPUT_NAME).elf $(OUTPUT_NAME).map

%.obj: %.cpp
	$(CC) -c $(CC_FLAGS) -o $@ $^
3. scatter file
The scatter file tells the linker where to place the compiled code. This can also be called linker script.
Each TinyCLR OS port from GHI Electronics has a region in RAM is reserved for loading Interops. It is called RLI (Runtime Loadable Interops). The can be placed anywhere in this region but we will likely place it at the base. Check the individual ports/product docs for where the RLI region is. In this example it is 0x20016000 on FEZ and BrainPad.
There instructions for using interops asks the developer to check the map file to find out where the interop table is placed in output binary. This has its advanced used but I think for most users this is too much work. I changed a couple of things to make force the interop table to be placed at the base. This way, we would never need to open the map file ![]() To do so, we need to change one thing in the sources generated earlier. Open the one generated header file and find the last line.
To do so, we need to change one thing in the sources generated earlier. Open the one generated header file and find the last line.
extern const TinyCLR_Interop_Assembly Interop_InterTest;
We can now move this table into a section called interop_table
extern const TinyCLR_Interop_Assembly Interop_InterTest __attribute__((section("interop_table")));
We can now create a scaterfile that places the “interop_table” at the base.
MEMORY {
	interop_table : ORIGIN = 0x20016000, LENGTH = 0x10
    RAM (wrx) : ORIGIN = 0x20016000+0x10, LENGTH = 0x3F8-0x10-8
}

SECTIONS {
	 interop_table : {
        * (interop_table)
    }>interop_table

 . = ALIGN(4);

	.text : {
    	*(.text)
    }> RAM

    .rodata ALIGN(4): {
        *(.rodata )
    }>RAM

    .data ALIGN(4): {
        *(.data)
    }>RAM

    .bss ALIGN(4): {
        *(.bss)
    }>RAM
}
4. TinyCLR.h
Before we build, we need TinyCLR.h file. This is the one file we will have to include in everything TinyCLR OS. Get the latest from github Releases · ghi-electronics/TinyCLR-Ports · GitHub
We are finally ready to build the native code! While this was a lot of steps, this only needs to be done once. We are also looking into converting this into a template. Still, it is good to know the internals if you want to get creative in the future.
To build the project, we will “open the folder” where we have combined all the above files.
IMPORTANT Tip: We can’t open the folder and the TinyCLR project in one Visual Studio instance but opening 2 instances of Visual Studio works well.
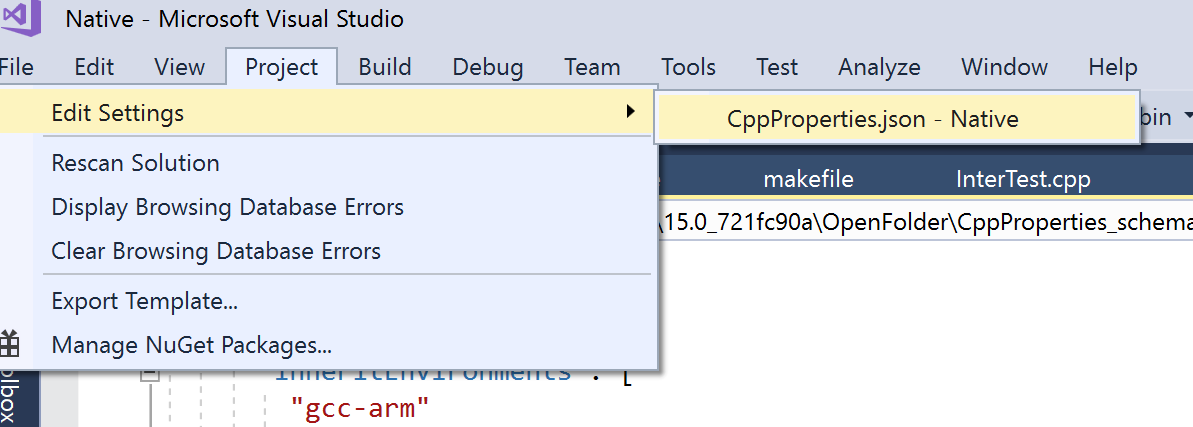
Once open we would need to click on ``Project->Edit Settings ->CppProperties.json```
Then change the file to
{
  "configurations": [
    {
      "inheritEnvironments": [
        "gcc-arm"
      ],
      "name": "gccarm",
      "includePath": [
        "${env.INCLUDE}",
        "include"
      ],
      "defines": [
        "__cplusplus = 201103L"
      ]

    }
  ]
}
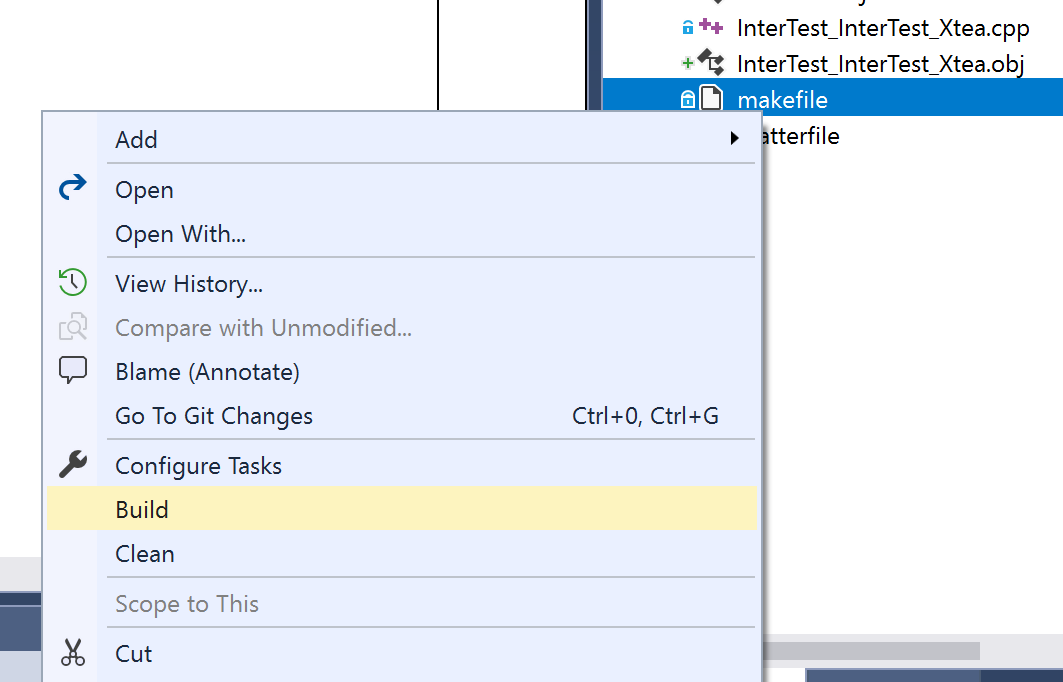
Now we can right-click the makefile and build the project.
Observe the output window
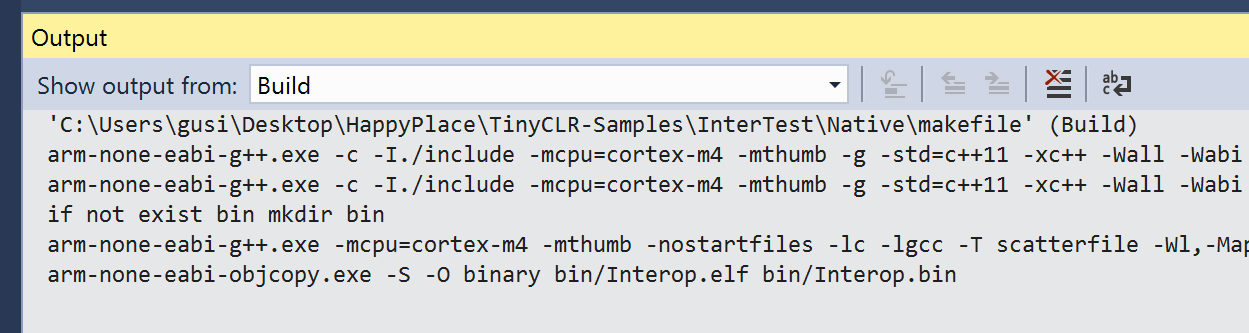
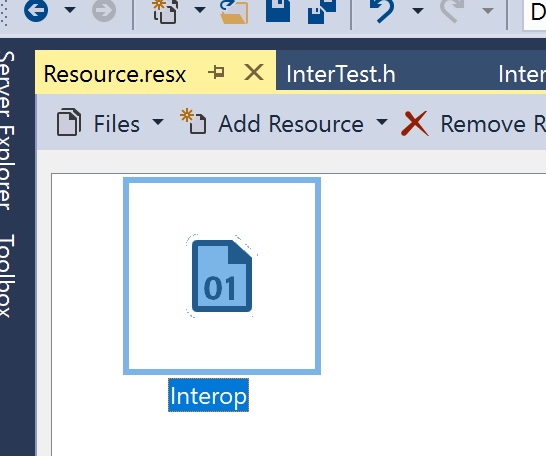
The build will generate Interop.bin file. This is the only file needed going forward. It has everything TinyCLR OS needs to use the native code. To include this into the application, we need to add a resource file to the TinyCLR project.
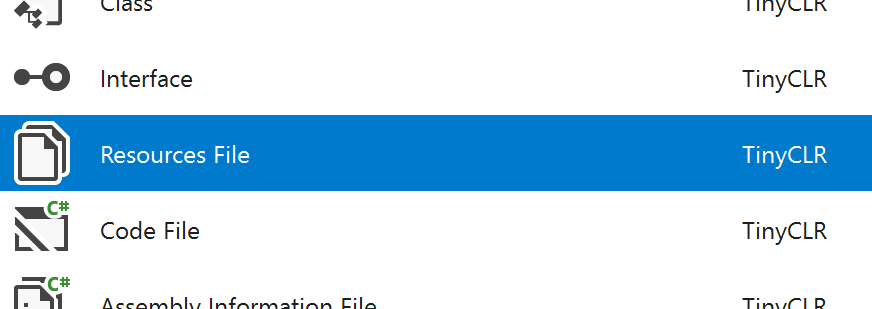
The bin file can now be placed into resources. We can simply drag it in there.
Go ahead and run the program and step through the code. If everything was done correctly, TinyCLR will successfully load the interop
Interop.Add(new IntPtr(RLI_ADDRESS));
If TinyCLR crashed (system locked up) then the binary was not built correctly. Since FEZ has crashed we will not be able to update it. The fix is simple as we can simply hold BTN2 button down while reset to prevent FEZ from executing the code.
After loading the interop image, execute one of the native methods. It should simply raise “Not Implemented Exception”.
When above works, we can change the native code to return success.
return TinyCLR_Result::Success;
Before proceeding, we can change the return to success and then rebuild the native binary, update it in the resource and finally test on the device. While the native method will simply not do anything, we have successfully passed on execution from managed to native, and back, safely.
The next step (Part 3) is to add the native code.
